Xenix 2.2.3c Restoration: Damage Mapping (Part 3)
This is the third exciting installment of this ongoing saga of restoring Xenix 2.2.3c. When we last left off, we had discovered that it is possible for Xenix to boot with several sectors missing in /etc/init and that the vast majority of the data on the diskettes was intact — to the point that several more steps of the early installation completed.
The story thus far:
- Part 1: Introducing Xenix 2.2.3c
- Part 2: No Tools, No Problem
[Aside: Quite a while ago, I came across the excellent OS/2 Museum, run by Michal Necasek which helps categorize many of the more obscure bits of PC history, including a series of articles about Xenix, Microsoft’s version of SVR2 UNIX.]
If we were to get any further, Michal and I would have to dig deep into the world of teledisk, floppy disk formats, and perform some creative thinking.
Sector Detector
The first step to solving a problem was characterizing it. That meant that the data we did have was almost certainly correct and that they corresponded to the sectors that existed on the disk. Michal had earlier confirmed that the TeleDisk images of Xenix 2.2.3c at the very least were internally consistent. As he worked on the TeleDisk images, I worked on characterizing the damage on the raw images.
The raw images indicated missing sectors by filling them with 0xF6 (unformatted) and were always in multiples of 512 bytes, consistent with the size of an individual sector. As such, I needed to know where in the disks we had holes. After a few hours of tinkering, I wrote sector_detector which generated this list.
Lots of numbers, right? Well, it’s not quite as bad as it looks. By using a hex editor and comparing strings, I got an idea of what is and isn’t missing. In the case of N1, it simply looks like there are some bits of junk data at the end of the filesystem which is why the output is so noisy. As I wrote to Michal, here was my initial report on what is and isn’t there.
The report attached is based on the original Xenix disks, and not ones
I modified.

Here's the good:
 - N3, N6, and B2 are healthy out of the box
 - B1 has a missing sector your already found.

 - The large number of free blocks at the end corresponds with the end
   of a set. N3 is the last disk the system needs for minimal
   installation.

 - On the whole, we're only missing one or two sectors from each disk

 - N2's missing 0-1 is probably "intended", since that's where the
   boot record should sit. Likely an artifact of how the disks were
   made originally.

 - The other two missing sectors on N2 are both init. As we've got a
   spare copy of this, I can reasonably say we have a complete set
   of minimal images now.

Here's the damage elsewhere:
 - N5: both: ./usr/bin/[a]db (ouch)

 - X1: both are uucp, code
 - X2: doscat, data section
 - X3: 1: /usr/spool/lp/model/imagen.spp - shell script for printer driver
       2: The divider between banner and /usr/bin/newline. Not exactly
          sure how much is lost, but the XOUT file looks like its all there.
          I see the header. Filename obtained from the manifest
 - X4: /etc/sysadmin. Shell script. The missing bit is in the backup
       Xenix code (IRONY!)
 - X5: Tailing end of dc, start of calendar. Mostly the tar header.

 - I1: part of ctype or calendar. Code
 - I2: /usr/lib/mail/alias. Code
 - I3: Part of the keyboard map script
(There was also damage on N1 that I wasn’t able to characterize at the time due to the fact it was filesystem formatted, and not a tar archive. This was noted shortly later. N4 also had a missing sector which I left out of this email by accident, but that bit of recovery has an article to itself.)
As I previously noted, the first two disks have a standard Xenix filesystem + bootsector. The others are simply raw tar images. As also noted by Michal’s report, he had successfully managed to extract some information from the TeleDisk images. To understand how, we need to break for a moment and dig into the nitty gritty of floppy disk formats.
Floppy Disks: An Overview
Most of the older users here remember floppy disks of various formats, low destiny, double destiny, 8in, 5.25-inch, 3.5-inch, and more. Many fondly remember them as a simpler era, or as those infernal devices that eat your data and caused no end of grief. Fewer people understand the specifics of how floppy disks are read, written and encoded.
In a broad sense, floppies are organized in the form of sides-tracks-sectors, identical in many respects to terms used to describe hard drives that use cylinders-heads-sectors. When we think of media, there are two ways to think of it: in terms of logical addressing or physical addressing. Normally, when we say that a file lives at 0x800 on a disk, it needs to be mapped to a physical location. For devices of the era, this mapping was known as drive geometry. By knowing the geometry of a drive, one can say definitively that a file at logical address 0x800 physically resides on side 0, track 0, sector 4.
NOTE: For clarification, sides and tracks are counted starting from 0, but sectors start at 1 and represent 512 bytes. Keep this in mind if you are checking my math by hand.
For normal disks of a given type, one can be reasonably assured of its geometry. For example, the Xenix 2.2.3c floppy disks are 720 KiB, and correspond to dumps of 3.5-inch double-density media. In drive geometry terms, that means by convention the data should be organized in the form of 2 sides, 9 tracks per side, and 80 sectors per track.
However, if one is careful, and understands the specifics of how floppy drives work, it is possible to use non-standard geometry successfully; this was the basis of most of the copy protection systems of the era that would made duplicating disks much more difficult. This functionality could be used as a form of emulation; for example, it is possible to use 5.25-inch geometry on 3.5-inch disks for cases of backwards compatibility. It can also be used to extend a disk past the 720k/1.44MiB mark; for example, Windows 95 shipped on 13 floppies, each of which contained 1.61 MiB.
When a computer talks to the floppy disk controller directly, it indicates the track or sector numbers it wishes to access. As a quirk of how floppy drives work, flat files can only represent disks with traditional geometry. Disks with a non-standard geometry cannot be accurately reproduced by a flat image file or by the standard tools of the era. Special archival tools such as TeleDisk, which knew how to directly interface with the FDC could, however, successfully image and reproduce these disks.
TeleDisk: Bane of Copy Protection
Due to the flakiness of floppies of the era, an entire cottage industry popped up of applications that could successfully copy non-DOS floppies, especially those with non-standard track geometry. One of the most common ones was a DOS utility known as TeleDisk, a shareware utility sold by a company known as Sydev, which wrote files in the form of TD0 files.
Unlike DISKCOPY, TeleDisk directly interfaced with the disk controller, and enumerated each disk’s side, track, and sector count, and stored these in a special file which could accurately represent and retain this information. TeleDisk’s custom format stores each track and sector ID in its own data block, and can represent any type of format that can exist on the physical medium. As such, it could accurately track which data was where, and could successfully map (though not reproduce) bad sectors and such when imaging a disk.
Raw images on the other hand can only accurately represent data in a linear format. Floppy disk emulators such as the one in VirtualBox must map raw sector commands to linear file locations, and can’t (easily) work with non-standard disks, and by default corresponds to a 1.44 MiB floppy disk. Recent versions of VirtualBox have some ability to do media detection based on the size of the floppy disk, while older ones allow you to override the media detection via an advanced option.
Over the years, the TeleDisk format was successfully reverse engineered and documented, and Michal had a set of tools to work with and manipulate them. From his side, he determined the following missing and duplicated data from the disks. From his e-mail:
I attacked the problem from a different angle, the TeleDisk images. Here’s a quick report:

 - Disk B1:
   - track 31, side 0: duplicate sector 6, 9
   - track 68, side 0: duplicate sector 5, 6, 7
 - Disk B2: all OK

 - Disk N1:
   - track 33, side 1: missing sector 6
 - Disk N2:
   - track 39, side 1: missing sector 6, duplicate sector 2, 3, 9
 - Disk N3: all OK
 - Disk N4:
   - track 36, side 1: missing sector 5, duplicate sector 2, 6, 7, 8
 - Disk N5:
   - track 65, side 0: missing sector 2, duplicate sector 4, 5, 7, 8, 9
 - Disk N6: all OK

 - Disk X1:
   - track 61, side 1: missing sector 8, duplicate sector 1, 2, 4, 7, 9
 - Disk X2:
   - track 68, side 0: missing sector 5
 - Disk X3:
   - track 30, side 0: missing sector 3, duplicate sector 1, 5, 8
   - track 61, side 1: missing sector 8, duplicate sector 1, 5
 - Disk X4:
   - track 65, side 0: missing sector 9, duplicate sector 1, 3
 - Disk X5:
   - track 32, side 0: missing sector 2, duplicate sector 1, 5, 8

 - Disk I1:
   - track 32, side 1: duplicate sector 1, 8, 9
   - track 65, side 1: duplicate sector 1, 4, 5, 6, 7, 8
 - Disk I2:
   - track 32, side 0: duplicate sector 1, 5, 9
 - Disk I3:
   - track 64, side 0: missing sector 3, duplicate sector 8

I *might* have missed something in case there are exactly as many duplicates as there are missing sectors on
some track.

As you can see, there is a bit of a pattern. The problems are all in the track ~34 and ~64 range, plus or
minus a few. When there is a problem, there are often sectors missing as well as duplicated, but sometimes
there are only missing or only duplicated sectors. Problems happen on both sides of the disks.
Through comparison, we determined that the raw disk images and the TD0 files we had, corresponded to the same dump as the missing sector locations lined up with each other. It is extremely likely that the TD0 files were created first (in 1996 according to the time stamp), and then converted to flat files at a later time. As such, any attempts at locating additional data would have to come from the TeleDisk images, something that Michal managed a breakthrough on.
In a few cases, the missing sectors in the raw were copied by a duplicate sector with the wrong header later in the TD0 file, and Michal was able to reassemble these bytes that way. Through that methodology, he managed to restore B1, I1,I2, and one of the sectors of N5. This gave us a (mostly) complete set of base media to work with! With these recovered sectors, the installer could now successfully run through a minimal installation:
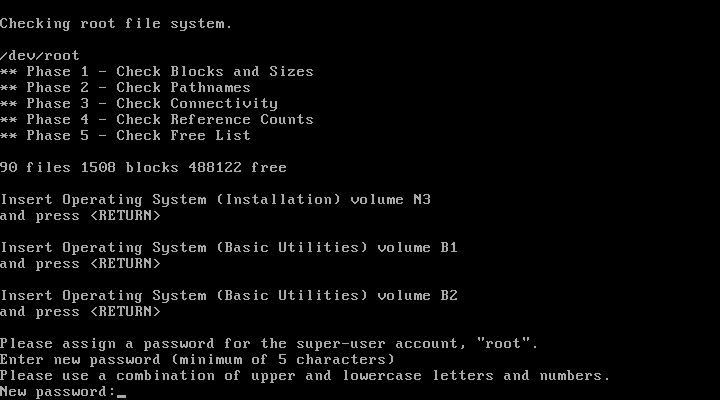
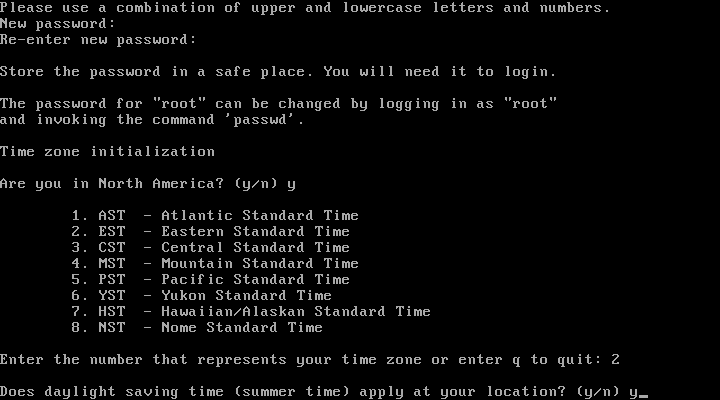
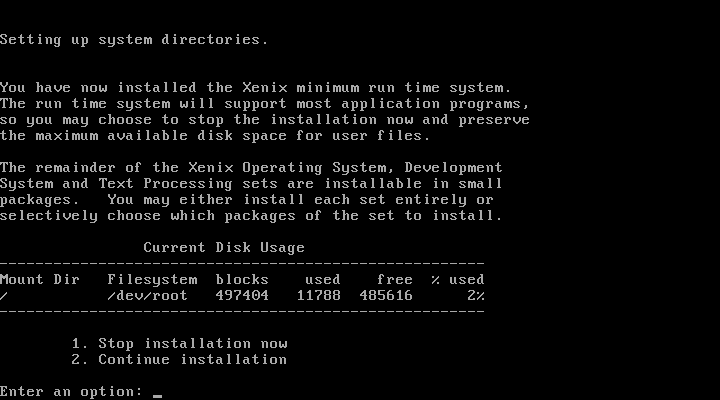
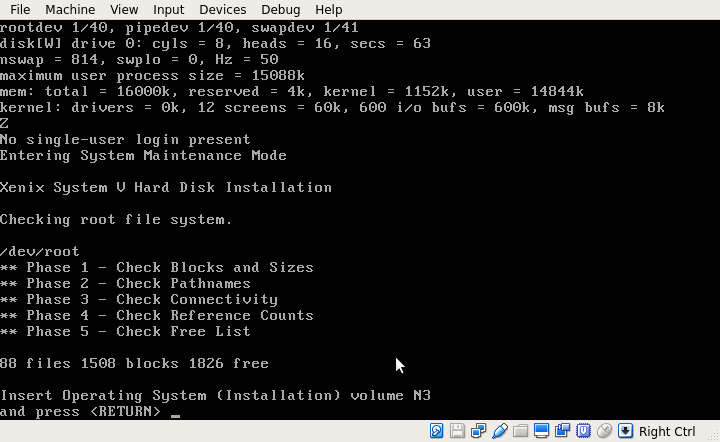
Selecting "Continue installation" would cause it to prompt for more disks and then die due to the broken manifest on N1 and due to missing sectors on the remaining disks. However, selecting "Stop installation now" would reboot the system, and successfully bring it up in multiuser mode!
Not a bad place to be considering where we started but we could do better. In addition, with a working Xenix 2.2 system on hand, I could confirm that Xenix itself uses normal disk geometry, and wouldn’t have been able to read non-standard disks out of the box. This was collaborated by the fact that if one removed the duplicated sector IDs, and added in the missing ones, I got a total of 1440 sectors per TeleDisk file, which corresponds to what you would expect to see for a normal diskette. As such, we were looking at floppy disk corruption or (more likely) a bad dump caused by a bad floppy drive or a TeleDisk bug due to the damage being consistent in similar locations on each disk.
Interesting Coincidence
At this point, I was going to go into further details on how the Extended Utilities disks were reconstructed, when something very interesting happened. Michael posted his version of the first part of this story on the 9th. In the comments, one John Elliott dropped a link to a more recent dump of two versions of Xenix 2.2 386 taken on March 5th (the day before Part 1 went up). Unless one of the SoylentNews editors is secretly holding out on me, it’s utterly bizarre that this surfaces now.
A quick check of the disks show that they appear to be completely intact (sector_detector didn’t show any missing bits), but these are not the same dumps we were working from. After pulling the disks apart, the disks correspond to Xenix 2.2.3c or 2.2.2j for the 386PS, while our dumps correspond to 2.2.3c 386AT.
386PS in this case corresponds to IBM’s PS/2 line of computers, which were based on the MicroChannel Architecture (MCA), and not the more common ISA/AT-compatible machines of the era. As such, the 386PS disks, while bootable, panics right after startup trying to enumerate devices.
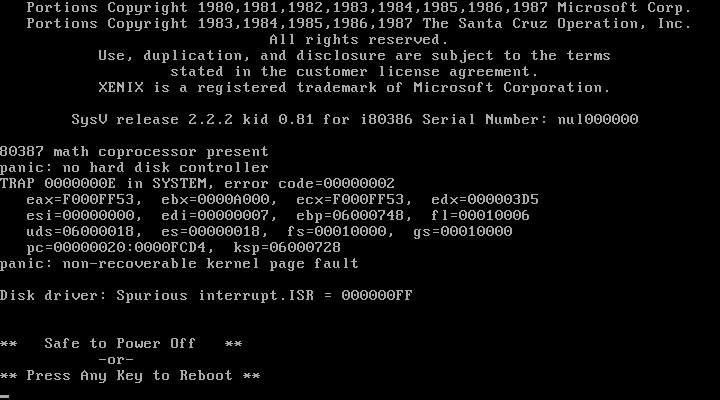
A review of the kernel link kit shows that this kernel is *very* similar to our 386AT kernel, with the primary difference being that the HDD driver is “hd”, vs. “wd”, and a few MCA configuration files are present within the link kit for tape backup devices.
Unfortunately, to my knowledge, there is no known emulator for MCA-based PCs; MAME has support for the PS/2, but only emulates an ISA-based variant. If anyone here has an MCA based PS/2 machine with a 386 processor, it should be possible to run and install these images; if someone wants to try, drop a line below. I may also try taking these disks, and swapping the kernel on N1 for the 386AT based version to get them running.
These disks also have answered a few lingering questions we had about the sector reconstruction, but we’ll get that into that more in the next installment :)
~ NCommander
Note: This post originally appeared on SoylentNews on March 13th, 2017
